A - Introduction
Couchbase Lite is a non-relational database, data is stored in documents instead of table rows.
A document is a JSON object that contains a number of key-value pairs. Entities, and relationships between entities, are managed within the document itself.
If you’re familiar with relational database, you’ll find that Couchbase Lite works differently and has its own database terminologies.
You can download Couchbase Lite library for Android at http://www.couchbase.com/nosql-databases/downloads#Couchbase_Mobile
Or add below line to graddle build file in Android Studio:
dependencies {
    compile 'com.couchbase.lite:couchbase-lite-android:1.0.3-4'
}
Add the following lines to the top-level allprojects/repositories section:
allprojects {
    repositories {
        jcenter()
        mavenCentral()
        maven {
            url "http://files.couchbase.com/maven2/"
        }
    }
}
B - Manager
Manager is the top-level object used to manage a collection of Database instances. You must create a Manager object in order to work with Couchbase Lite in your application.
To create a Manager object, we just need to call the constructor:
@Override
protected void onCreate(Bundle savedInstanceState) {
    super.onCreate(savedInstanceState);
    setContentView(R.layout.activity_main);

    try {
        mManager = new Manager(new AndroidContext(getApplicationContext()), Manager.DEFAULT_OPTIONS);
    } catch (IOException ex) {
        Log.e("MainActivity", "Cannot create Manager instance", ex);
        return;
    }
}
By default, the Manager will open a Database with read and write permission. If you want to modify the permission, you can pass a ManagerOptions object to the constructor:
ManagerOptions managerOptions = new ManagerOptions();
managerOptions.setReadOnly(true);
mManager = new Manager(new AndroidContext(getApplicationContext()), managerOptions);
C - Databse
Database is a container for documents, a scope for queries and the source and target for replications.
Remember that Database is not a table! Couchbase Lite doesn’t have any term that equal to table in relational database.
A database has following elements:
- Name: only accept lowercase ASCII letters, digits, and the special characters
_$()+-/ - Documents
- Views
- Filter functions
- Replications
We will talk about each elements in more details later.
1. Create a database
You can create an empty database by just open it:
try {
    mDatabase = mManager.getDatabase("icetea09-database");
} catch (CouchbaseLiteException e) {
    e.printStackTrace();
}
2. Delete a database
To delete your database and all its attachments permanently, you have to call delete method.
After deleted database, you should assign null value to the Database reference.
@Override
protected void onDestroy() {
    try {
        mDatabase.delete();
    } catch (CouchbaseLiteException e) {
        Log.e("MainActivity", "Cannot delete database", e);
        return;
    }
    super.onDestroy();
}
D - Document
In document database, document is the primary entity stored in database - not row or record.
In Couchbase Lite, document has following elements:
- ID: unique in entire database and cannot be changed
- Current revision ID: will change every time document updated
- History of past revision IDs
- Body: JSON object that contains stored data
- Attachments: binary blobs used to store large media files or non-textual data
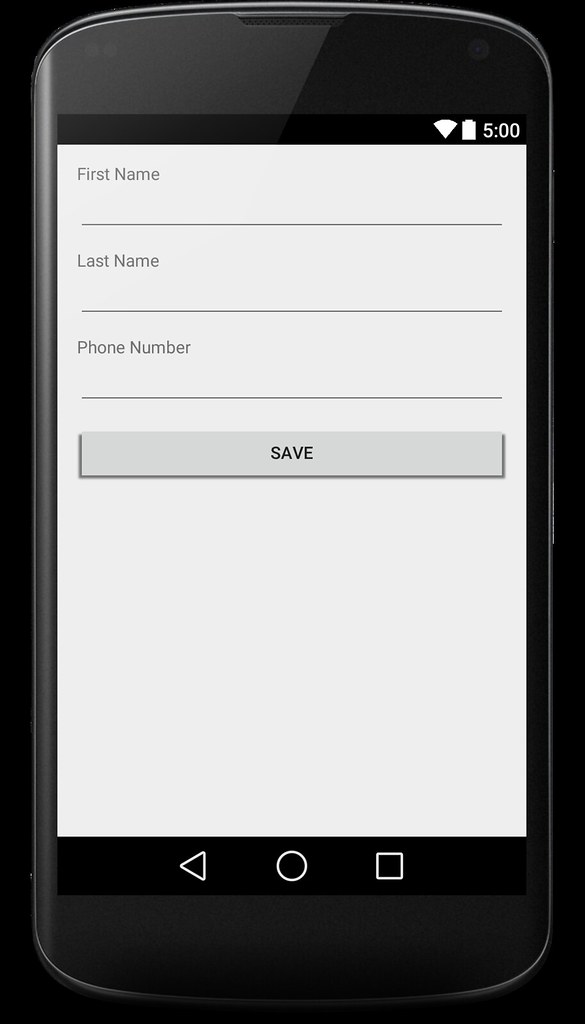
To demonstrate for the CRUD operation in Couchbase Lite, I’ll create a simple form allow user to update their contact information:
1. Create document
The following code will show you how to create a document with assigned UUID. If you didn’t assign any UUID to the document, the ID will be generated randomly.
private void saveContactInfo(String firstName, String lastName, String phoneNumber) {
    //Create new document with random UUID
    //Document document = mDatabase.getDocument(CONTACT_INFO_DOCUMENT_ID);

    Document document = mDatabase.getDocument(CONTACT_INFO_DOCUMENT_ID);

    Map<String, Object> properties = new HashMap();
    properties.put(FIELD_FIRST_NAME, firstName);
    properties.put(FIELD_LAST_NAME, lastName);
    properties.put(FIELD_PHONE_NUMBER, phoneNumber);
    try {
        document.putProperties(properties);
    } catch (CouchbaseLiteException e) {
        Log.e(TAG, "Cannot save document", e);
    }

    try {
        document.putProperties(properties);
    } catch (CouchbaseLiteException e) {
        Log.e(TAG, "Cannot save document", e);
    }
}
2. Retrieve document
In order to retrieve a document, you have to know its UUID:
private ContactInfo getContactInfo() {
    try{
        Document doc = mDatabase.getDocument(CONTACT_INFO_DOCUMENT_ID);
        String firstName = doc.getProperty(FIELD_FIRST_NAME).toString();
        String lastName = doc.getProperty(FIELD_LAST_NAME).toString();
        String phoneNumber = doc.getProperty(FIELD_PHONE_NUMBER).toString();
        return new ContactInfo(firstName, lastName, phoneNumber);
    }
    catch (Exception ex){
        Log.e(TAG, "Cannot get contact info", ex);
    }
    return null;
}
3. Update document
Please refer to the “Create document” section, cause Update document is almost the same code and you must have the document UUID to be able to update its content.
private boolean updateContactInfo(String firstName, String lastName, String phoneNumber) {
    Document document = mDatabase.getDocument(CONTACT_INFO_DOCUMENT_ID);

    Map<String, Object> properties = new HashMap();
    properties.putAll(document.getProperties());
    properties.put(FIELD_FIRST_NAME, firstName);
    properties.put(FIELD_LAST_NAME, lastName);
    properties.put(FIELD_PHONE_NUMBER, phoneNumber);
    try {
        document.putProperties(properties);
        return true;
    } catch (CouchbaseLiteException e) {
        Log.e(TAG, "Cannot save document", e);
        return false;
    }

}
The only different is
properties.putAll(document.getProperties());
This line allow you to update the document with the same _rev. Or else, your updating will be rejected. Please find more details on 5. Revision.
4. Delete document
private void deleteContactInfo() {
    Document document = mDatabase.getDocument(CONTACT_INFO_DOCUMENT_ID);
    try {
        document.delete();
    } catch (CouchbaseLiteException e) {
        Log.e(TAG, "Cannot delete document", e);
    }
}
To download the source code for this demo, please refer Download section at the bottom of this post.
5. Revision
Every Document has a property call _rev. It is the revision ID and will be generated automatically every time you update document value.
Every time you want to update document value, you have to pass the correct current _rev. Or else, the updating will be rejected.
That was demonstrated in the updating code:
properties.putAll(document.getProperties());
By putAll old properties values, you got the current _rev of the document.
E - Attachment
As you know, Attachment is a part of Document but its not a part of document body (the JSON object).
The reason is to allow storing large binary data files in document and not affecting the JSON parsing performance. Cause attachment will be loaded on demand not when loading JSON body.
A document can have many attachments identified by different names. Each attachment has been tagged by its MIME type that helps the application interpret its content.
To demonstrate for creating, updating and retrieving attachments, we add one more ImageView into the screen to display user profile picture.
1. Create/Update attachment
To create an Attachment, first create an UnsavedRevision, set Attachment content and finally save it. Update will be the same:
private void saveAvatar() {
    Document doc = mDatabase.getDocument(CONTACT_INFO_DOCUMENT_ID);
    ByteArrayOutputStream bos = new ByteArrayOutputStream();
    Bitmap bitmap = ((BitmapDrawable) mImgAvatar.getDrawable()).getBitmap();
    bitmap.compress(Bitmap.CompressFormat.PNG, 0 /*ignored for PNG*/, bos);
    byte[] bitmapdata = bos.toByteArray();
    ByteArrayInputStream bs = new ByteArrayInputStream(bitmapdata);

    try {
        UnsavedRevision newRev = doc.getCurrentRevision().createRevision();
        newRev.setAttachment("avatar.jpg", "image/jpeg", bs);
        newRev.save();
    } catch (CouchbaseLiteException e) {
        Log.e(TAG, "Cannot save attachment", e);
    }
}
2. Retrieve attachment
Once you already had an attachment, you can access it via its name:
private Bitmap getAvatar() {
    Document doc = mDatabase.getDocument(CONTACT_INFO_DOCUMENT_ID);
    Revision rev = doc.getCurrentRevision();
    Attachment att = rev.getAttachment("avatar.jpg");
    if (att != null) {
        try {
            InputStream is = att.getContent();
            BufferedInputStream bif = new BufferedInputStream(is);
            return BitmapFactory.decodeStream(bif);
        } catch (CouchbaseLiteException e) {
            Log.e(TAG, "Cannot load attachment", e);
        }
        return null;
    }
    return null;
}
3. Delete attachment
To delete an attachment, just call removeAttachment:
private void deleteAvatar(){
    Document doc = mDatabase.getDocument(CONTACT_INFO_DOCUMENT_ID);
    try{
        UnsavedRevision newRev = doc.getCurrentRevision().createRevision();
        newRev.removeAttachment(AVATAR_JPG);
        newRev.save();
    }
    catch (CouchbaseLiteException e){
        Log.e(TAG, "Cannot delete attachment", e);
    }
}
F - View
A View is a persistent index of documents in a database, generated using map/reduce, which you then query to find data.
1 - Create and initialize Views
To create a View object, we need to call the getView() method of Database object. In case not existing, the database will create new one with the input name.
And before query on the View, you have to register the mapping function for it:
View mPhoneView = mDatabase.getView(VIEW_PHONE);
    mPhoneView.setMap(new Mapper() {
        @Override
        public void map(Map<String, Object> document, Emitter emitter) {
            List<String> phones = (List) document.get(FirstDemoActivity.FIELD_PHONE_NUMBER);
            for (String phone : phones) {
                emitter.emit(phone, document.get(FirstDemoActivity.FIELD_FIRST_NAME) + " " + document.get(FirstDemoActivity.FIELD_LAST_NAME));
            }
        }
    }, "1");
}
In the setMap() method, you can see that we have 2 parameter:
- Mapper object contain the definition of mapping function
- String describe the mapping funtion version. Every time you change the behavior of mapping function, you must change the version string. Otherwise, the databse won't realise any changes you made.
2 - Reduce functions
Reduce funtion recieves the indexed key/value pairs of mapping function and processse, aggregates them to one single object.
Reduce funtion is optional and not commonly used. It usually used to count, calulate the sum or average of the result.
mPhoneView.setMapReduce(new Mapper() {
        @Override
        public void map(Map<String, Object> document, Emitter emitter) {
            List<String> phones = (List) document.get(FirstDemoActivity.FIELD_PHONE_NUMBER);
            for (String phone : phones) {
                emitter.emit(phone, document.get(FirstDemoActivity.FIELD_FIRST_NAME) + " " + document.get(FirstDemoActivity.FIELD_LAST_NAME));
            }
        }
    }, new Reducer() {
        @Override
        public Object reduce(List<Object> keys, List<Object> values, boolean rereduce) {
            return values.size();
        }
    }, "1");
G - Query
Now you have View already, and to retrieve result from View you must know about Query.
1 - Create a Query
To create a Query object, you can call getQuery() method of a View. By default, that query will return all rows in view in increasing order by key.
But you can change this by some common properties like:
startKey: the key to start at. The default value,null, means to start from the beginning.endKey: the last key to return. The default value,null, means to continue to the end.descending: If set totrue, the keys will be returned in reverse order. (This also reverses the meanings of thestartKeyandendKeyproperties, since the query will now start at the highest keys and end at lower ones!)limit: If nonzero, this is the maximum number of rows that will be returned.skip: If nonzero, this many rows will be skipped (starting from thestartKeyif any.)
mQuery = mDatabase.getView(VIEW_PHONE).createQuery();
mQuery.setDescending(true);
mQuery.setLimit(20);
2 - Run Query
After created a Query object and customized its properties, you can run it.
The result is a QueryEnumerator, which provides a list of QueryRow objects, each one describing one row from the view’s index.
try{
    QueryEnumerator result = mQuery.run();
    for (Iterator<QueryRow> it = result; it.hasNext(); ) {
        QueryRow row = it.next();
        Log.w("MYAPP", "Widget named %s costs $%f", row.getKey(), ((Double) row.getValue()).doubleValue());
    }
}
catch (CouchbaseLiteException e){
    e.printStackTrace();
}
That’s it!
That’s all I want to share with you in this post about Couchbase Lite.
I hope that this post can give you the general view about Couchbase Lite and how to use it to store data in your application.
You can find more details about source code in the following link: